Q. WHAT is a DRYPOINT ?
A. A DRYPOINT is a hand made printed image made by engraving a sheet of metal / plastic or acrylic. The image is scratched into the surface with a stylus or sharpened nail. The DRYPOINT is inked with etching ink which sinks into the grooves. The surface of the image is carefully wiped with scrim and then with tissue paper to clean the surface, which will be the white areas of the print. Next the inked plate is gently place on the bed of a press and a dampened piece of Japanese paper is placed over it. Then the two items are rolled through the press, squashing the ink onto the paper. Traditional printmakers, like Gustave Dore, would engrave a sheet of copper but I am using acrylic sheet.
DAY 1. How to make a DRYPOINT engraving.
RESOURCES
IMAGE to copy. Either a photo or in this case a drawing.
sheet of acrylic (2mm thick)
stylus or scriber
magnifying glass
printing paper
masking tape
kitchen paper
etching inks (I prefer oil based inks but in schools and colleges water based inks are the norm)
scrim
tissue paper
etching press
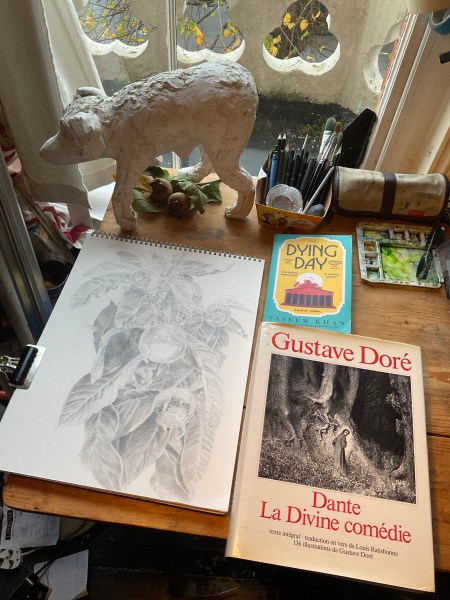
step one. DRAW your subject – and below is one I made earlier – it’s a drawing of some medlars, given to me by a very good friend. The drawing is 40 x 30.5 cms or 16”x12” .
NB : The photograph shows a copy of Dante’s Devine Comedy, which is richly illustrated with engravings by Gustave Dore.
Step 2. My print will be 24 x 30.5cms and the first part of making the DRYPOINT is to select a composition that reads well and I slid my piece of acrylic over the drawn image, choosing the part of the drawing that I want to reproduce.
Below is a photo of the sheet of acrylic is in its desired place and taped to secure it to the sketchbook underneath. In the foreground is a protective layer of kitchen paper, on which is a stylus / scriber.

Step 3. Begin tracing the image with a stylus. The grooves that you scratch into your acrylic need to be fairly deep, consequently quite a bit of pressure is needed. Pull the stylus towards you in short sharp marks. The photo shows the very beginning of the process and I will add another post detailing the next steps.

Leave a comment